
We introduced Michelle a few posts back (here) and we are so ready to sit back, enjoy, learn, and be inspired by what Michelle has to share with all of us.
Welcome Michelle!

michelle morris photography
Q and A
Ok here is one that’s been on my mind! What’s the best to do: custom white balance, kelvin AWB or other? If custom white balance what’s the best way to set it?
I use AWB for everything.

 f/2.0, shutter 2500
 f/2.5, shutter 2500


I would love to know some processing tips. And her go-to equipment. I love to shoot wide open, and that seems to be her style too.
Go to equipment - The only camera I use is the Canon 5D Mark II and the lens I use almost 100% of the time is the Canon 50mm f/1.2L. I don’t use a flash (don’t even own one) and I always work at times I can use natural light (either indoors or out). I will occasionally use a reflector - but not as a standard practice.
As far as shooting wide open - yes, my goal is to always be as wide open as possible. Usually when my sessions start (about two hours before sunset) I am somewhere around f/2.5 - f/3.4 when the sun is highest in the sky. The lower the sun gets, the more wide open I am. The only times I am down to f/1.2 are in open shade, not ever when I’m shooting directly into the sun.
I would love to know more about her post processing, maybe some before & afters?
Since there are so many little ins and outs of post processing, I think one of my most valuable “tips” would be to sit down and finish a session at one time. I’ve found that doing edits here and there from different sessions really interferes with my creative process. I try to carve out 2-4 hours to sit at one time and just run through an entire sessions edits (that is after I’ve selected which images to edit and I’m good to go). That has helped me tremendously, not only from a time management perspective, but also from a consistency and creative prospective. Pandora, coffee, edit.
After a session I download my images, which are anywhere from 600-1200 files from one session, and I rate the images either 5 stars or no stars (trash). I do that right away upon initial download, and I always go with my gut on what to keep and what to purge. I can quickly get that 800ish number down to around 100. Those 100 are my files to edit in Photoshop and whittle down again to about the 50 image mark (for the final proof set).
My editing usually always starts with an adjustment in curves for exposure. After curves, I will adjust the levels and get the image to where I am ready to play some actions, and I’m happy with the colors and exposure.
I typically use the Florabella Collection on my images that are shot directly into the sun. On the shots that are more in open shade, I tend to use Totally Rad Actions. I have the full collection for both of those sets and some of my favorites from the Florabella Collection are Milk, Vanity, Tuesday, and Swoon. Some of my favorites from TRA are Lux (soft), Flare-Up, Ged Faded (winter), and Pool Party.
When I use actions, I don’t use them at full opacity (that usually looks really funny to me) and I play around with the opacity of all the layers inside the action to achieve the desired look. I also use masks in Photoshop to apply certain affects of the actions to only portions of the image.
Ok here is one that’s been on my mind! What’s the best to do: custom white balance, kelvin AWB or other? If custom white balance what’s the best way to set it?
I use AWB for everything.
How do you deal with focus when shooting into the sun and it’s almost impossible to grab a focus point?
Patiently. It can be frustrating to not be able to quickly grab a focus point quickly - especially when your subject is two years old and running away from you like you’re a monster. If I am working with a subject that can be coaxed to stay in one place for a brief minute (usually those older than 5 or 6) I will just continue to talk and engage them while moving around ever so slightly until the camera focuses. Sometimes it just moving your body inches here or there and then it focuses. I keep trying while I keep chatting with them, so that when I finally am focused and ready, they are still expressive and natural.
For those that don’t really stay still.... I will pull out my bag of tricks in making animal noises and singing and doing everything an unashamed mommy/photographer will do to get their attention. As I keep trying to get their attention with my nutty behavior, I work on the focus. It’s multitasking at its finest!
The image below shows one of my favorites from a shoot earlier this summer where the camera grabbed the weeds as a focus point and not my senior, and it ended up being one of my favorite shots. I loved the perspective of both her in and out of focus. So again - patience is key, and sometimes you get lucky with a neat shot that was otherwise unintended but turns out nicely in the end.

Best time of day for sunflare?
I tend to get my best sunflare about 1 hour before the sun sets. Afternoons always seem to work better for me than mornings. There’s a little window of time in there where the sun is too bright and the flare is just very exaggerated, and then the sun sets a bit too much and there’s no flare, just a golden glow. I like to find that 30ish minutes of time where the flare is just enough to be fun, but not so much that everything is blown. I usually start working about two hours before the sun sets, or about 20-30 minutes after the sun rises. I find that working during those times gives me a good variety.
For example, the first image (1.jpeg) shows quite a bit of exaggerated sunflare, and was taken at the beginning of the session. The second image (2.jpeg) was taken about thirty minutes later and while it still has sunflare, it’s not over the top. The last image (3.jeg) was taken just before the sunset and there really is no flare at all, just a nice soft glow. I think it’s important to walk that fine line with your clients of providing consistency in style, but also variety.
 f/2.0, shutter 2500
f/1.8, shutter 2000
I have also found that it’s important to only work during those times that you know will produce your best product. Weddings and events are different in that you have to work with the timing of the day - but for me in my work with children and families, I only schedule sessions during those times. I am familiar with how the sun falls and rises in those times and sessions are easy and comfortable for me because of that.
How do you keep the subject fully lit from the front while still catching that beautiful sunflare?
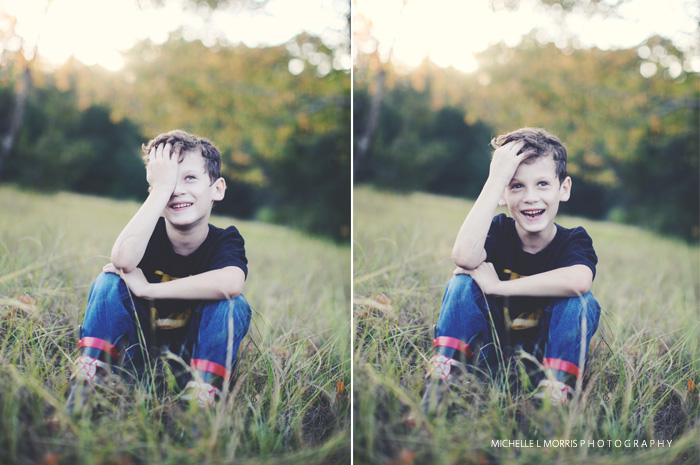
The truth is that the subject is not usually fully lit from the front, SOOC. First that has to be dealt with in camera using proper exposure techniques. And secondly, that’s adjusted during editing. There are several examples below that show the SOOC (straight out of the camera) file and then the edited finished product. You can see that the face and focal point of the subject is not perfectly lit until some editing is done. However, as it is said frequently, you’re not going to be able to really “fix” an image with editing. It needs to at least start with proper exposure in camera. All of the edits listed below have the cliff notes version of how the edit was completed. It’s worth noting though that all of these images had some form of hand editing and masking to achieve the final look. For example, I may lighten the face in an image using masking, so that the rest of my image stays “as is” and I am only adjusting the selected areas by hand.
The truth is that the subject is not usually fully lit from the front, SOOC. First that has to be dealt with in camera using proper exposure techniques. And secondly, that’s adjusted during editing. There are several examples below that show the SOOC (straight out of the camera) file and then the edited finished product. You can see that the face and focal point of the subject is not perfectly lit until some editing is done. However, as it is said frequently, you’re not going to be able to really “fix” an image with editing. It needs to at least start with proper exposure in camera. All of the edits listed below have the cliff notes version of how the edit was completed. It’s worth noting though that all of these images had some form of hand editing and masking to achieve the final look. For example, I may lighten the face in an image using masking, so that the rest of my image stays “as is” and I am only adjusting the selected areas by hand.


How do you get your school portraits so well lit and crisp?
I work closely with the Directors and Principals of each of my schools and we chat about what’s best for them logistically as well as what’s best for me from a technical aspect. We always have a plan in place with a detailed schedule before we start shooting. I prefer to shoot all school portraits outdoors, facing the kids into light - but using only open shade. I use a professional backdrop and stand, layering my backdrop with additional fabric to keep all the light from filtering through the back. I have the children stand up (I have found that to be better than sitting) and I use the light to my advantage, which usually requires me to move my setup around a bit here and there throughout the day. I place the kids anywhere from 3-6 feet away from the backdrop to create that bokeh. Proper exposure is everything and in these cases so important because I have less than a minute with each child to get the “money” shot. My settings for school portraits are usually somewhere around f/2.5 - f/4.5 and shutter around 300-800 depending on the time of day. I check my shots frequently throughout the day to be sure I’m on the right track.
The crispness and light in the images are all handled in camera, and the school pictures are minimally edited as a finished product due to the high volume, and the fact that everything is batch edited and nothing is done by hand.
The crispness and light in the images are all handled in camera, and the school pictures are minimally edited as a finished product due to the high volume, and the fact that everything is batch edited and nothing is done by hand.


***
Thank you Michelle for putting so much effort in and taking the time to answer such great questions. Thank you everyone who asked such great questions! If you learned or were inspired by anything here, take a moment and thank Michelle personally at michelle@michellelmorrisphotography.com.
It's photographers like her who are so open to sharing that make this such an incredible industry.
I think it's pretty evident that Michelle likes to teach and likes to share. So much so, that she is launching an entirely new store and site that is called UNPACKED and it's a "for photographers" business complete with one on one mentoring and lots of instant downloads and tutorials. There is not an official launch date, yet, but we will be watching for it to be announced and will surely share it on our facebook page with all of you too!
And...just because we love her imagery so much...here is more of her lovely sun drenched
eye candy for you!
And...just because we love her imagery so much...here is more of her lovely sun drenched
eye candy for you!


thank you Michelle.
xo
xo
gigi and lexi
thank you so much michelle for being so open and giving us such great information!
ReplyDeletexo
Thank you! This was very informative! Loved all the info and the images. I will have to bookmark this page to refer to the tips over and over!
ReplyDeleteChristine
Loved it! Thank you so much for sharing...
ReplyDeleteSome great tips for photogs -- thanks! What do you use for your backdrop for school photos and where might I be able to buy a black or white one?
ReplyDeletedonnadanoff@yahoo.com
donna,
ReplyDeleteyou may want to email michelle directly with your question;)
sharp picture, nice...
ReplyDeletethank you :)